 Photo credit: myrecipes.com
 Photo credit: whatscookingamerica.net
My husband prefers the former, although he adores cinnamon rolls any which way. In fact, my husband loves cinnamon rolls so much, I'm surprised he married me before I had ever made him even one batch. (...with this cinnamon roll, I thee wed...) To him, making cinnamon rolls equals showing love, which explains why he made me so many when we were engaged -- especially interesting, since I'm sort of neutral on cinnamon rolls. You can imagine that I was excited to make him this new version. Because a different kind of cinnamon roll is a different kind of love!
The recipe comes from The Bread Bible, by Beth Hensperger. The book was given to me by a friend at Christmastime, and this was my first chance to use it. I wasn't disappointed. Ms. Hensperger's instructions seemed great (which is where many baking cookbook authors fail), but the real proof of that will be when I make a recipe for some item I've never seen before.
I did struggle with the recipe a little bit, but it was all my fault:
1. I wanted to follow everything to the exact letter (even though I've made cinnamon rolls many times), so I tried to keep everything (potato water, tap water, dough) to the precise temperatures specified while having 4 kids underfoot. That wasn't wise. This was a "wait until the kids are in bed" kind of recipe.
2. I didn't use a big enough potato in the beginning (maybe I peeled it too much, because I could have sworn it was 6 oz). It didn't yield enough potato water or puree, so I chose to do that step over again. The potato aspect of this recipe already makes it somewhat more complicated than a standard cinnamon roll recipe, but it didn't help that I tried to add another potato to what I already made. I had my thermometer jumping from pan to pan like a crazy person. I think Jeff's comment was, "Does this recipe really require you to use every bowl in the house?"
 Boiling potatoes on a stove I hope I no longer own in a year.
3. I don't have a food mill, and I didn't want to dirty the food processor. I know, I know. I'm totally weird about that. My food processor is particularly annoying to set up, not to mention the annoyance of cleaning the stupid thing. Still, my decision to press the potato through a sieve was not my brightest moment. It took forever, and it made this weird hairy dot formation on the back of the sieve that made me feel totally sick (I have an issue [I'm not calling it a phobia] with raised dots. More on that later). I should have just gotten out the blasted food processor. It's not that annoying.
Once I finally finished the dough, it was smooth sailing. As far as a review goes, I don't think the additional step of using potato puree turned out anything better than the other cinnamon roll recipes that I've been using for years. For that reason, I wouldn't make this again. But I'm still happy about having tried this recipe: I got some beautiful rolls out of it, and my husband was beyond pleased. He really does go crazy for these things. Did I already mention that? CRAZY! For me, cinnamon rolls are just okay. Nothing to write home about. But at least I like them. Jeff hates my two favorite vegetables: asparagus and cauliflower. Hates! How is that possible?? Life is so, so hard in our house. Harder than the Great Depression. I mean, we don't agree on food. Could it get any tougher, really?
 The rolled out dough, with cinnamon and brown sugar. Note the tomato sauce can in the background. My parents always kept one in the flour to measure one cup, so I do the same.

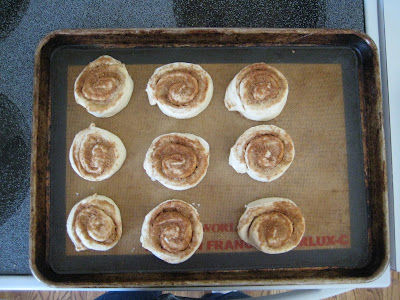 Ready for the oven! (I had another pan with the cinnamon rolls spread out more. These ones are pushed to one side because I was hoping they would "accidentally" touch, making them the "squished together" type of cinnamon rolls, which I like a little better. It didn't work.)
 My hand, after working with the dough. More raised dots. How can that not sick you out? This wasn't quite so gross that I couldn't take a picture, but still. Disgusting.
Cinnamon Rolls
from The Bread Bible, by Beth Hensperger
DOUGH
1 russet potato (about 6 ounces), peeled and cut into large chunks
2 tablespoons unsalted butter
1/4 cup warm water (105°-115° F)
1 tablespoon (1 package) active dry yeast
1/2 cup granulated sugar, or 1/2 cup (packed) light brown sugar
2 tablespoons vegetable oil
1 large egg, at room temperature
1 teaspoon salt
5 to 51/2 cups unbleached all-purpose flour
FILLING
4 tablespoons unsalted butter (1/2 stick), melted
1 1/4 cups packed light brown sugar
1 1/2 tablespoons ground cinnamon
1 cup dark raisins or dried currants, plump in hot water 10 minutes and drained (optional)
1 cup (4 ounces) walnuts or pecans, toasted (see NOTE) and coarsely chopped (optional)
GLAZE
1 cup sifted confectioners' sugar
4 to 5 tablespoons milk
1. In a medium saucepan, combine the potato chunks with water to cover. Bring to a boil, reduce the heat to low, and cook, uncovered, until tender, about 20 minutes. Drain the potato, reserving 1 cup of the liquid. Let the potato water cool to 105° to 115°F. Meanwhile, process the potato with the butter through a food mill placed over a bowl or puree it in a food processor fitted with the metal blade just until smooth. This produces 3/4 to 1 cup of puree.
2. Pour the warm water in a small bowl. Sprinkle the yeast and a pinch of the granulated or brown sugar over the surface of the water. Stir to dissolve and let stand at room temperature until foamy, about 10 minutes.
3. In a large bowl with a whisk or in the work bowl of a heavy-duty electric mixer fitted with the paddle attachment, combine the pureed potato, reserved warm potato water, yeast mixture, remaining granulated or brown sugar, oil, egg, salt, and 2 cups of the flour. Beat hard to combine, about 1 minute. Add the remaining flour, 1/2 cup at a time, until a shaggy dough that just clears the sides of the bowl is formed.
4. Turn the dough out onto a lightly floured work surface and knead until smooth and springy, about 4 to 6 minutes if kneading by hand. If kneading with dough hook or electic mixer, knead 4 minutes on medium speed. Dust with flour 1 tablespoon at a time as needed to prevent sticking. Take care not to add too much flour, because the dough should be very satiny.
5. Put the dough in a greased deep container. Turn once to coat the top and cover the bowl with plastic wrap. Let rise in a warm place until doubled in bulk, about 1 hour. Gently deflate the dough and let rise a second time until doubled in bulk, 50 minutes to 1 hour.
6. Preheat the oven to 350°F. Place an oven rack in the middle of the oven. Line a baking sheet with parchment paper.
7. Gently deflate the dough and turn it out onto a lightly floured work surface. Divide the dough into 2 equal portions. Roll out each portion into a 10-by-14-inch rectangle at least 1/4 inch thick. Brush the surface of each rectangle with the melted butter. Sprinkle the surface of each rectangle evenly with half of the brown sugar and cinnamon, leaving a 1-inch border around the edges. Sprinkle with the raisins or currants and nuts, if using. Starting from the long side, roll the dough up jelly-roll fashion. Pinch the seams together and, using a serrated knife or dental floss, cut each roll crosswise into 9 equal portions, each 1 to 1 1/2 inches thick. Place each portion cut side up on the prepared pan at least 2 inches apart. Press gently to flatten each swirl slightly. (Alternatively, place in 18 greased 3-inch muffin-pan cups for a top-knot effect.) Cover loosely with plastic wrap and let rise at room temperature just until puffy, 20 to 30 minutes.
8. Put the baking sheet or muffin cups in the center of the oven and bake 25 to 30 minutes, or until golden brown and firm to the touch. Using a metal spatula, transfer to a wire rack. Immediately prepare the glaze by combining the confectioners’ sugar and milk in a small mixing bowl and whisking until smooth. Adjust the consistency of the glaze by adding more milk, a few drops at a time, to make a pourable mixture. Dip your fingers or a large spoon into the glaze and drizzle it over the rolls by running your hand or the spoon back and forth over the tops. Or, apply the glaze to the rolls with a brush. Let sit until just warm before eating.
NOTE: To toast nuts, preheat the oven to 350°F. Spread the nuts on a sided baking sheet and toast, stirring once or twice, until fragrant and lightly browned, about 8 to 10 minutes for walnuts (halved) and pecans.
TO MAKE AHEAD: Dough may be made ahead and refrigerated overnight, covered with a double layer of plastic wrap. Let stand at room temperature 3 to 4 hours before filling and rising. Once made, the buns can be stored at room temperature for up to 3 days or freeze in self-sealing freezer bags for up to 3 months.
The recipe comes from The Bread Bible, by Beth Hensperger. The book was given to me by a friend at Christmastime, and this was my first chance to use it. I wasn't disappointed. Ms. Hensperger's instructions seemed great (which is where many baking cookbook authors fail), but the real proof of that will be when I make a recipe for some item I've never seen before.
I did struggle with the recipe a little bit, but it was all my fault:
1. I wanted to follow everything to the exact letter (even though I've made cinnamon rolls many times), so I tried to keep everything (potato water, tap water, dough) to the precise temperatures specified while having 4 kids underfoot. That wasn't wise. This was a "wait until the kids are in bed" kind of recipe.
2. I didn't use a big enough potato in the beginning (maybe I peeled it too much, because I could have sworn it was 6 oz). It didn't yield enough potato water or puree, so I chose to do that step over again. The potato aspect of this recipe already makes it somewhat more complicated than a standard cinnamon roll recipe, but it didn't help that I tried to add another potato to what I already made. I had my thermometer jumping from pan to pan like a crazy person. I think Jeff's comment was, "Does this recipe really require you to use every bowl in the house?"
 Boiling potatoes on a stove I hope I no longer own in a year.
3. I don't have a food mill, and I didn't want to dirty the food processor. I know, I know. I'm totally weird about that. My food processor is particularly annoying to set up, not to mention the annoyance of cleaning the stupid thing. Still, my decision to press the potato through a sieve was not my brightest moment. It took forever, and it made this weird hairy dot formation on the back of the sieve that made me feel totally sick (I have an issue [I'm not calling it a phobia] with raised dots. More on that later). I should have just gotten out the blasted food processor. It's not that annoying.
Once I finally finished the dough, it was smooth sailing. As far as a review goes, I don't think the additional step of using potato puree turned out anything better than the other cinnamon roll recipes that I've been using for years. For that reason, I wouldn't make this again. But I'm still happy about having tried this recipe: I got some beautiful rolls out of it, and my husband was beyond pleased. He really does go crazy for these things. Did I already mention that? CRAZY! For me, cinnamon rolls are just okay. Nothing to write home about. But at least I like them. Jeff hates my two favorite vegetables: asparagus and cauliflower. Hates! How is that possible?? Life is so, so hard in our house. Harder than the Great Depression. I mean, we don't agree on food. Could it get any tougher, really?
 The rolled out dough, with cinnamon and brown sugar. Note the tomato sauce can in the background. My parents always kept one in the flour to measure one cup, so I do the same.
I am a horrible estimator and divider. I can't even divide a peanut butter and jelly sandwich evenly. I use a ruler to make that first division properly. Doesn't this look like an arm with a major flesh wound?
 Ready for the oven! (I had another pan with the cinnamon rolls spread out more. These ones are pushed to one side because I was hoping they would "accidentally" touch, making them the "squished together" type of cinnamon rolls, which I like a little better. It didn't work.)
 My hand, after working with the dough. More raised dots. How can that not sick you out? This wasn't quite so gross that I couldn't take a picture, but still. Disgusting.
Between these nasty dots and the flesh wound above, one might get the idea that I'm not trying to inspire your appetite to make these recipes. I promise: baking can be very enjoyable. In fact, there are so many visual and textural things to LOVE that I feel bad for pointing out just the ones that grossed me out. I love the feel of the risen dough. I love the texture of the brown sugar in my hands as I spread it over the flattened dough rectangle. I love the look of the cinnamon as it is shaken out of the container. I love cutting through the rolls and placing them on the pan. I love the feel of mixing the glaze (first it seems dry, then it suddenly is almost too wet), and I love drizzling it over the rolls. If you're even reading this, you probably love those things too!
Cinnamon Rolls
from The Bread Bible, by Beth Hensperger
DOUGH
1 russet potato (about 6 ounces), peeled and cut into large chunks
2 tablespoons unsalted butter
1/4 cup warm water (105°-115° F)
1 tablespoon (1 package) active dry yeast
1/2 cup granulated sugar, or 1/2 cup (packed) light brown sugar
2 tablespoons vegetable oil
1 large egg, at room temperature
1 teaspoon salt
5 to 51/2 cups unbleached all-purpose flour
FILLING
4 tablespoons unsalted butter (1/2 stick), melted
1 1/4 cups packed light brown sugar
1 1/2 tablespoons ground cinnamon
1 cup dark raisins or dried currants, plump in hot water 10 minutes and drained (optional)
1 cup (4 ounces) walnuts or pecans, toasted (see NOTE) and coarsely chopped (optional)
GLAZE
1 cup sifted confectioners' sugar
4 to 5 tablespoons milk
1. In a medium saucepan, combine the potato chunks with water to cover. Bring to a boil, reduce the heat to low, and cook, uncovered, until tender, about 20 minutes. Drain the potato, reserving 1 cup of the liquid. Let the potato water cool to 105° to 115°F. Meanwhile, process the potato with the butter through a food mill placed over a bowl or puree it in a food processor fitted with the metal blade just until smooth. This produces 3/4 to 1 cup of puree.
2. Pour the warm water in a small bowl. Sprinkle the yeast and a pinch of the granulated or brown sugar over the surface of the water. Stir to dissolve and let stand at room temperature until foamy, about 10 minutes.
3. In a large bowl with a whisk or in the work bowl of a heavy-duty electric mixer fitted with the paddle attachment, combine the pureed potato, reserved warm potato water, yeast mixture, remaining granulated or brown sugar, oil, egg, salt, and 2 cups of the flour. Beat hard to combine, about 1 minute. Add the remaining flour, 1/2 cup at a time, until a shaggy dough that just clears the sides of the bowl is formed.
4. Turn the dough out onto a lightly floured work surface and knead until smooth and springy, about 4 to 6 minutes if kneading by hand. If kneading with dough hook or electic mixer, knead 4 minutes on medium speed. Dust with flour 1 tablespoon at a time as needed to prevent sticking. Take care not to add too much flour, because the dough should be very satiny.
5. Put the dough in a greased deep container. Turn once to coat the top and cover the bowl with plastic wrap. Let rise in a warm place until doubled in bulk, about 1 hour. Gently deflate the dough and let rise a second time until doubled in bulk, 50 minutes to 1 hour.
6. Preheat the oven to 350°F. Place an oven rack in the middle of the oven. Line a baking sheet with parchment paper.
7. Gently deflate the dough and turn it out onto a lightly floured work surface. Divide the dough into 2 equal portions. Roll out each portion into a 10-by-14-inch rectangle at least 1/4 inch thick. Brush the surface of each rectangle with the melted butter. Sprinkle the surface of each rectangle evenly with half of the brown sugar and cinnamon, leaving a 1-inch border around the edges. Sprinkle with the raisins or currants and nuts, if using. Starting from the long side, roll the dough up jelly-roll fashion. Pinch the seams together and, using a serrated knife or dental floss, cut each roll crosswise into 9 equal portions, each 1 to 1 1/2 inches thick. Place each portion cut side up on the prepared pan at least 2 inches apart. Press gently to flatten each swirl slightly. (Alternatively, place in 18 greased 3-inch muffin-pan cups for a top-knot effect.) Cover loosely with plastic wrap and let rise at room temperature just until puffy, 20 to 30 minutes.
8. Put the baking sheet or muffin cups in the center of the oven and bake 25 to 30 minutes, or until golden brown and firm to the touch. Using a metal spatula, transfer to a wire rack. Immediately prepare the glaze by combining the confectioners’ sugar and milk in a small mixing bowl and whisking until smooth. Adjust the consistency of the glaze by adding more milk, a few drops at a time, to make a pourable mixture. Dip your fingers or a large spoon into the glaze and drizzle it over the rolls by running your hand or the spoon back and forth over the tops. Or, apply the glaze to the rolls with a brush. Let sit until just warm before eating.
NOTE: To toast nuts, preheat the oven to 350°F. Spread the nuts on a sided baking sheet and toast, stirring once or twice, until fragrant and lightly browned, about 8 to 10 minutes for walnuts (halved) and pecans.
TO MAKE AHEAD: Dough may be made ahead and refrigerated overnight, covered with a double layer of plastic wrap. Let stand at room temperature 3 to 4 hours before filling and rising. Once made, the buns can be stored at room temperature for up to 3 days or freeze in self-sealing freezer bags for up to 3 months.


